|
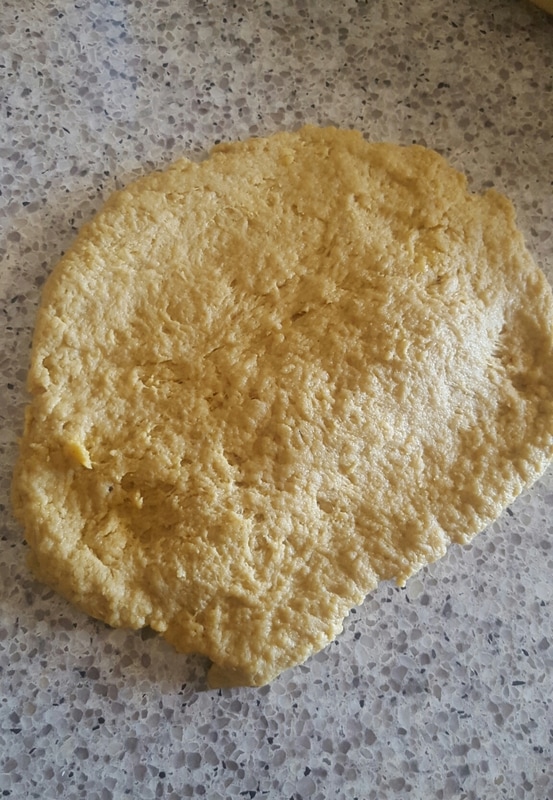
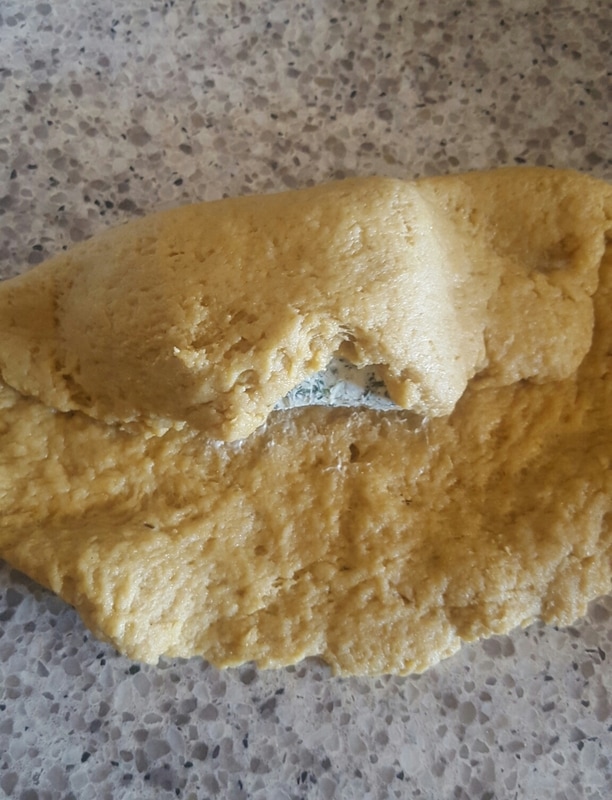
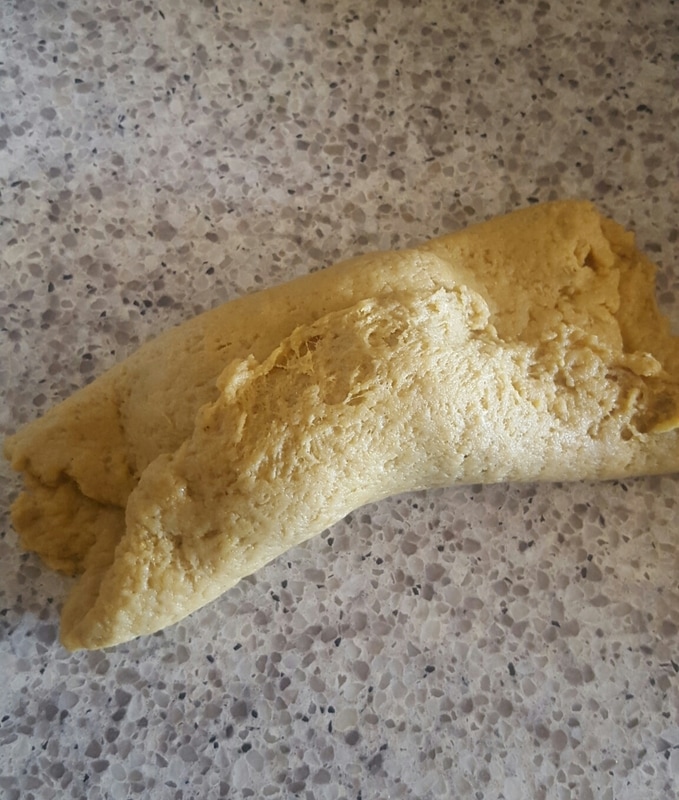
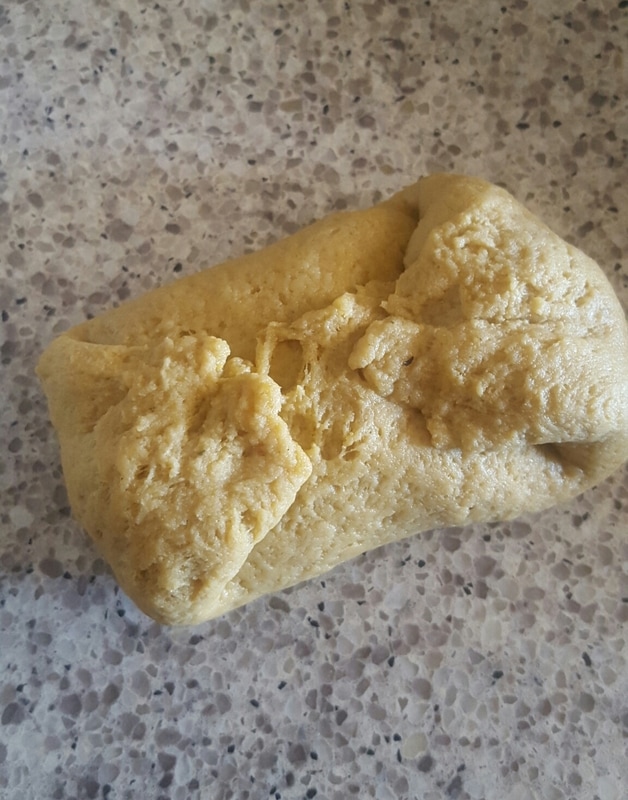
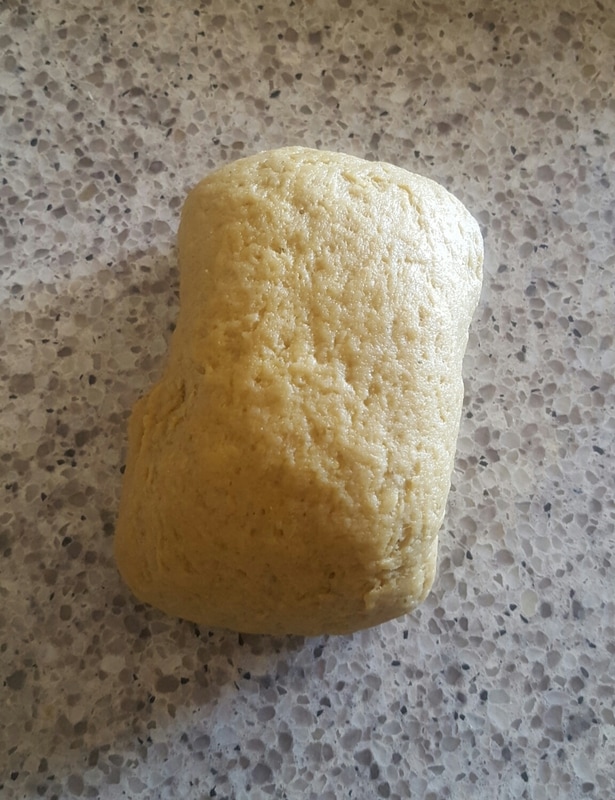
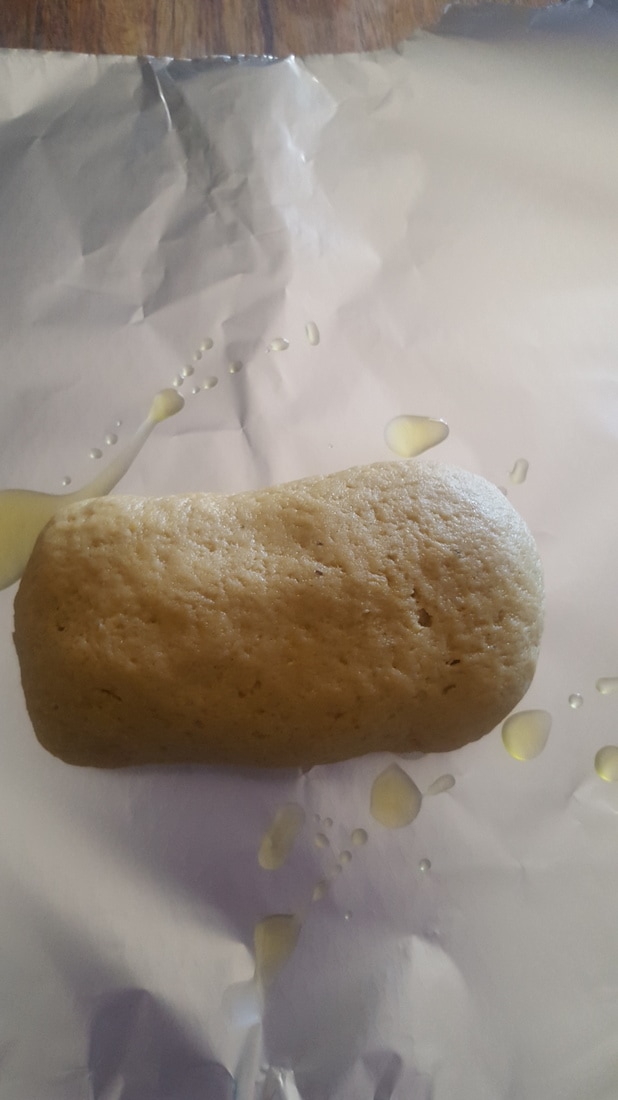
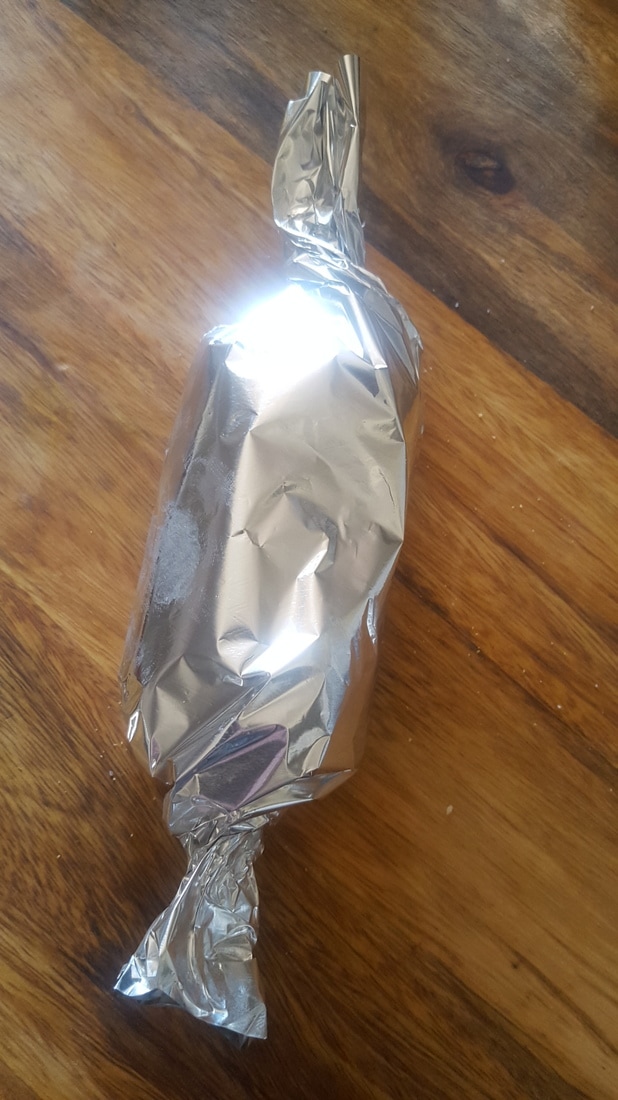
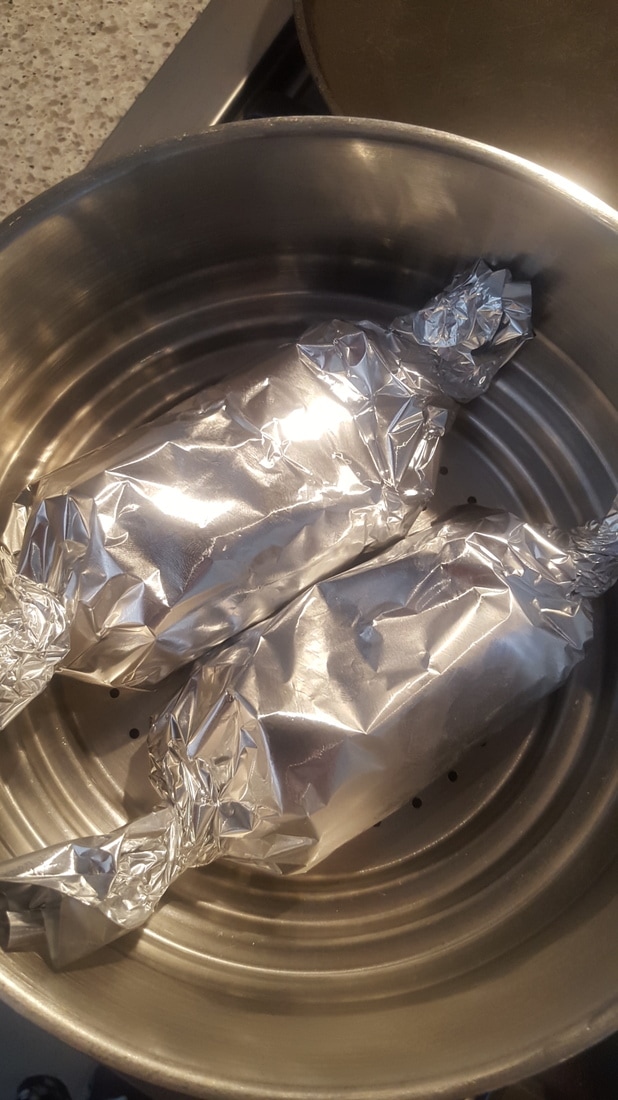
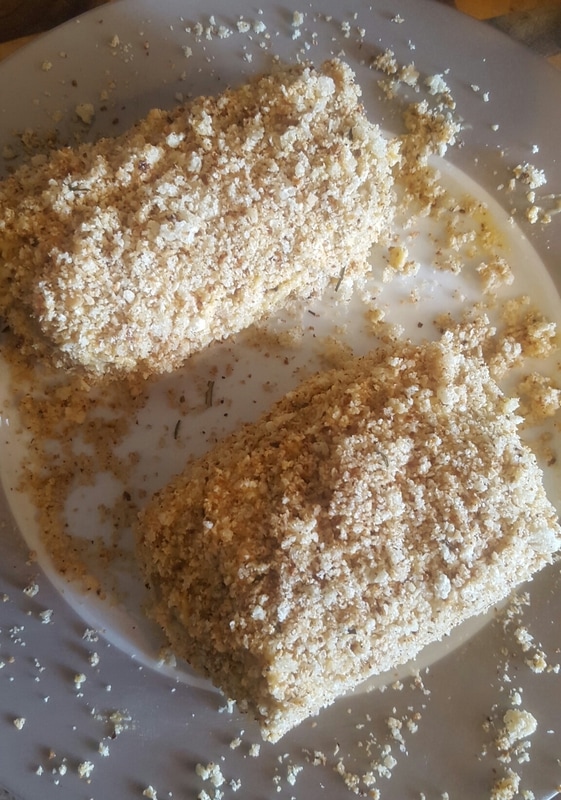
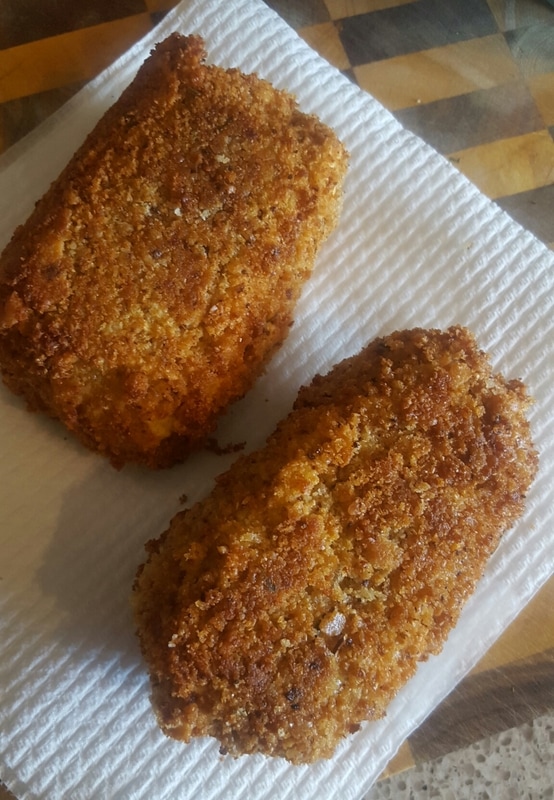
Crispy breadcrumbed chick'n flavoured seitan with a garlic and herb butter centre... Confession time! I've never eaten a kiev. Ever. I'm not a big garlic fan (shock.. horror.. I know!!). I've seen people asking for Vegan kiev a few times and got to thinking how it could be done. I've been making seitan successfully for a while now and had faith that my recipe would work without leakage as long as I was careful with the wrapping of the butter part. It has a few parts to the process so it does take a little time - but I think it is worth the effort. I'll take you through step by step, but first I'll give the ingredients for each step. The recipe make two large kievs - but if you're careful with the wrapping stage, it would make more smaller ones. Ingredients for the butter 1 cup cold butter Finely chopped garlic (I'll leave the amount up to you!) Fresh herbs of choice (I used parsley and mint - again quantity is up to you) Black pepper Combine your butter, herbs and garlic in a bowl and add black pepper to taste. Place onto a sheet of baking paper and roll into a cracker shape. Place in the freezer to firm up. Ingredients for the chick'n seitan 1 cup gluten flour 1/2 cup chickpea or besan flour 2 tbsp nutrional yeast 1 tbsp onion powder 1 cup strong chick'n stock Place your dry ingredients into a bowl and add in your cooled stock. Bring to a dough and kneed very lightly for less then a minute. Set aside. Ingredients for the coating 1 cup chickpea or besan flour 1/2 to 3/4 cup of milk 4 slices of bread toasted and then blitzed into breadcrumbs Now onto assembly. Divide your seitan dough into portions. As I said earlier, I did two. Roll out to about the size of a small plate. Important point here - try to have it thicker in the middle and tapering out at the edges as this will give a more even distribution of the seitan once you've enclosed the butter. Remove your butter from the freezer and cut into the number of pieces you need. Place a piece of butter into the centre and bring over the top edge. Repeat with the bottom edge and then bring in the sides. Pinch and squeeze the seitan dough together to form as tight a seal as possible. (See pics below). Now enclose each parcel in a sheet of oiled foil and place in the fridge to firm up for 20 minutes. You now need to steam the parcels for about 25 minutes in the foil to cook the seitan. Once you've done that, allow to cool and return the parcels to the fridge again for 30 minutes. Now we're onto the coating part. Add your milk slowly into your besan flour in a medium sized bowl, stirring between each addition. It needs to be a thick paste and different flour brands vary. Lay your breadcrumbs out onto a large plate. Unwrap your Kievs and carefully dip into your flour and milk mixture until it is coated all over. Gently roll in your breadcrumbs and set aside. Heat up about an inch and a half of vegetable oil in a frying pan. To test the heat - drop a small piece of bread into the oil. If it sizzles immediately then you're good to go. Carefully place your kievs into the oil and leave for about 3 to 4 minutes. Gently turn and repeat on the other side. Remember all you're doing now is reheating the inner and crisping the outer - the seitan is already cooked. Remove and place on kitchen paper to drain. Now you're ready to serve. Don't forget if you want to serve these already cut - then you need to cut them on the plate otherwise all your lovely buttery centre will be lost! We had them with Dauphinoise potatoes and steamed greens.
15 Comments
Rachael
3/4/2017 12:51:07 pm
I am so excited to try this!!! I'll let you know as I go :)
Rachael
3/4/2017 12:52:01 pm
That was meant to be how, not as I go, lol :)
Tracey
3/4/2017 09:19:24 pm
Ha ha. Looking forward to seeing how you do Rachael 😀😀
Tracey
15/8/2017 09:01:41 am
Hi Lynn. I always use Nuttelex Buttery 😊
Tane
3/4/2020 07:03:23 pm
I’m going to make these this week! It’s so nice to find vegan recipes online that use easy to find Australian ingredients. Thank you and keep on posting.
Tracey
4/4/2020 06:18:34 am
Hi! Thank you. I hope you enjoy these. It's been a long time since I made them but please shout out if you need any help. 😊😊
Sara Haveron
14/4/2020 05:06:53 am
Amazing recipe, turned out amazing .......... Thank you 😍
Tracey
14/4/2020 08:19:34 am
Hi Sara! Thank you for posting. I'm so glad you had success with this one. It's such an old recipe that I only made the once and it could be a lot better now that I know a lot more 🤣🤣. One day I'll get around to updating it 😊
Nancy
1/5/2020 08:06:13 pm
What is vegan chicken stock?
Tracey
1/5/2020 09:20:35 pm
Hi Nancg. It's a broth thats flavoured like chicken but is Vegan. Massell is the brand I use. If you can't find it, just use vegetable stock as a sub 😊
Louise
13/5/2020 06:38:36 pm
Can these be baked rather ham fried?
Tracey
6/8/2020 05:35:04 pm
Louise. Apologies. I've only just stumbled across your comment!! It was hiding in spam.
Esther Hughes
22/10/2020 04:41:41 am
This recipe looks amazing! Just curious though, have you tried freezing these for later use? If so, at what point do you think it could be frozen? Thank you 😊
Tracey
22/10/2020 08:40:06 am
Hi Esther. Your comment will be posted after it is approved.
Leave a Reply. |
AuthorI'm a married mother of one, living in Melbourne. I've been Vegan since May 2015. 
CategoriesArchives
May 2020
|


 RSS Feed